Thursday, December 18, 2014

Animation Production: Shot 3 and Shot 11

Now that I am further into my degree program (only five months till my expected graduation date), I only have one class per month from now on. Therefore, instead of having a wide variety of projects to post, we have been focusing solely on one project over the course of the month.

This month, I had Animation Production for my class. My team and I (five of us total) were instructed to collaborate and create a short animated film that incorporated two animated pieces from each team member. The story is about a happy, yet clumsy, young man that is on a mission to rescue the damsel in distress (the girl that was kidnapped). He has to over come some minor struggles to get to the girl and rescue her, but he does so in the way that he knows best, regardless of how clumsy he really is. The final piece will include background music, sound effects for things that happen in the scene, title page, and a credit page for everyone involved in the project. Everything in the scene was previously modeled and textured for us so that we could focus on just solely the animation of the characters in the scene.

I honestly had a great time with this project! Animation is very intriguing for me and I learn a great deal about it every time I animate something new. I cannot wait to create short animated films myself to entertain others. Also, my group was fantastic to collaborate with! Everyone was very constructive, open minded to all creative ideas, and easy to communicate with. I am excited to post up our final product for everyone to see. For now, I will post up the shots that I had the pleasure of animating myself.

Here is the first shot I animated, shot 3. The male character is looking for a way to get into the window where the girl is located, and is very excited when he finds the box that he could use as a step stool to the window.

And here is the second shot that I animated, shot 11. The male character is doing is best to untie the girl (who is in a rush to escape) when they both hear a noise coming from her kidnapper. Once they hear the noise, they both are even more rushed to escape the room.


Tuesday, November 18, 2014

Visual Effects 2: Final Project (Maya Shatter effect)

This week, we were allowed to choose any visual effect type that of our choice to create our final project with. I had just recently done research on Maya's shatter effect, so I decided to use that effect for  my final project. Honestly, this turned out to be my favorite project from this class so far. I really had fun with project - and even added in a little holiday spirit in it, just for fun! For this project, I used passive colliders (the floor), gravity fields (both ornaments), a radial field (the shattered ornament), nCloth (the cloth in the background), and Maya's shatter effect. When I say "both ornaments", I mean that I did a visibility swap between the first ornament (falling straight down to the floor), and the second ornament (the one that shatters). The swap took place as soon as the ornament touched the floor. For texturing, I used MIA material x shaders for the ornaments so that I could create their shiny, reflective appearance. For the texture of the floor, I used a file node of a wood texture and created a bump map in photoshop. For the blanket in the background, I just simply used a file node for it's texture. As for the lights in the scene, I used two point lights (both orange/yellow lights). The main issue that I ran into this project was getting the shatter effect to work properly for me. I had to key the magnitude of the radial field as well as the gravity so that I could control how much the ornament shattered. That took a little while of trial and error to figure out. Also, once the shatter took place, only the ornament would shatter outward so I had to manually key the metal top piece of the ornament to make it look like it fell off of the ornament as it shattered. Overall, however, I really enjoyed learning about the shatter effect and would love to continue on with visual effects in the future! Thank you for your time and interest! Also, happy holidays! :)
Please check out my artist Facebook page: www.facebook.com/ShannonGilmoreArtwork


Monday, November 10, 2014

Visual Effects 2: Project 2 - Houdini Pyro (Final Project)

At last - I have finally finished my Houdini FX Pyro fire! For this project, I created the effect of a house catching on fire. I wanted to create the effect of bright red, hot fire with dark, thick smoke billowing from within that fire. These kind of house fires generate enough smoke that it emerges upward for quite a long distance.

To create this effect, I went into Houdini, imported the geometry of the house, and then created 3 emitters (cubes that were placed just on the surface of the roof). Each of these emitters had a "fire" effect placed on it, which contains smoke with it. Each of the fires' containers were scaled up in the y-axis so that the fire and smoke could float up at a higher distance. I adjusted the fires smoke by adding in red and making orange and red dominate most of the fire's color. I also adjusted the smoke's color to create a dark smoke. To create the 3D appearance of the fire, I added in a distance light and adjusted the smoke density so that the smoke would have darker shadows from the the light - giving it more depth. The smoke and fire's dissipation was adjusted respectively to the fire that was being worked on.

In the end, I am happy with the final product. The only issues that I really ran into was realizing how sensitive the fire and smoke are to the dissipation numbers, and the render times took a long time. The flip book took five and a half hours to render out (170 frames), and the fire took six and a half hours to render out (120 frames). This was the most difficult part of the process. Other than that, I now realize how amazing projects can become by using Houdini Pyro and I will be able to make great use of this in future projects!

Below I have attached my final render, along with the flip book of the final render. Thank you and enjoy!


Visual Effects 2: Project 2 - Houdini Pyro (WIP)

For this project, we were instructed to create a fire by using Houdini FX Pyro effects. This fire is very similar to the fire we made previously (last week) in Maya with Maya Fluids. However, we are just now working in a different software program.

For my project, I decided to create the effect of a house catching on fire. House fires generate a lot of thick, dark smoke and bright red, hot fire. The fire also emerges from  all areas of the house (windows, doors, roof, walls, ect.)

Here is the current WIP (work in progress) I have for this project. Obviously, it still needs a lot of improvement. However, I am really surprised at the effect I was able to achieve with this software program! The smoke looks extremely realistic to me, and the fire behaves like a real fire too. I will continue to work on this project for a nicely rendered out final project.

Monday, November 3, 2014

Rigging (Art Eval): Scripting - Variable Looping Troubleshooting

This month, along with my two on campus classes I am also taking an online course which is my Art Evaluation for Rigging (Set Up). This evaluation preps me for my portfolio production and the creation of my demo reel. Each week, a milestone is due. There are four milestones total. Each milestone proposes it's own challenges and troubleshooting issues that I must figure out in order for the rig to work properly.

I was in need of creating a script that would create a control for the selected joint(s), orient that control the same way that the joint is oriented, put a pad on the control, put a parent constraint on the joint selected to the control, and parent the consecutive controls to one another.

How to run the script: Select a joint - run the script.
         The script should create 2 pad groups above a generated control.
         The pads and control should contain the name of the joint as part of their names. I don't care how you name your pads/icons/joints, as long as you are consistent.
         The control should have identical orientation as the joint.
         The joint should be constrained to the control
When I first ran the script, I would select each joint in the joint chain and run the script. As a result, I would get the correct grouping, padding, naming conventions, and orientation. However, the only joint that contained a parent constraint on it was the last joint selected.

Here is the script I was using initially:
'''
Shannon Gilmore
Gilmore_Shannon_ArtEvaluation_Campus1411.py

Description:
Rigging Tools - Milestone 2

import Gilmore_Shannon_ArtEvaluation_Campus1411
reload(Gilmore_Shannon_ArtEvaluation_Campus1411)
''' 

import pymel.core as pm

# On selected joints.
# Create a local oriented control.
joints = pm.ls(selection=True)

# Loop through selected joints
for current_joint in joints:
    # Rename control and delete history
    #ct_back_01_bind -> ct_back_01_icon
    icon_name = current_joint.replace('_bind', '_icon')
    pad_name = current_joint.replace('_bind', '_pad')
    group_name = current_joint.replace('_bind', '_group')
    

    # Create a circle
    control_icon = pm.circle(name=icon_name, radius=.6, normal=[1, 0, 0])[0]
    
    # Create a group
    pad = pm.group(name=pad_name)
    
    # Create Orient Group
    group = pm.group(name=group_name)
    
    # Snap group to target joint.
    # Snapping using parent constraint.
    kenny = pm.parentConstraint(current_joint, pad)
    
    # Delete parent constraint.
    pm.delete(kenny)
    
    # Parent Constraint Joint to Control
    pm.parentConstraint(control_icon, joints, mo=True, w=1)


What I didn't realize was that I was not including the pieces of the script that told Maya that it needed to loop through the controls.
I also needed to add in the scripting that tells Maya to parent the control to it's previous pad. I reached out to one of my teachers for an insight of what could possibly be the problem, when he told me it was an issue with looping variables. From this, I elaborated on the script a little bit, double checked all of the names that were used and where they were being placed, and I finally made the script a successful one.

Here is the final script with it's new changes:
'''
Shannon Gilmore
Gilmore_Shannon_ArtEvaluation_Milestone2_Scripting_Campus1411.py

Description:
    Grouping the controls.
    Naming and orienting controls.
    Putting pads on controls.
    Constraining joints to controls.

How to Run:

import Gilmore_Shannon_ArtEvaluation_Milestone2_Scripting_Campus1411
reload(Gilmore_Shannon_ArtEvaluation_Milestone2_Scripting_Campus1411)

'''

import pymel.core as pm

# Select joint chain.
# On selected joints.
# Create a local oriented control.
joint_system = pm.ls(selection=True, dag=True)

last_control = None

# Loop through selected joints
for current_joint in joint_system[0:-1]:
    # Rename control and delete history
    #ct_back_01_bind -> ct_back_01_icon
    icon_name = current_joint.replace('_bind', '_icon')
    pad_name = current_joint.replace('_bind', '_pad')
    group_name = current_joint.replace('_bind', '_group')
    

    # Create a circle
    control_icon = pm.circle(name=icon_name, radius=.6, normal=[1, 0, 0])[0]
    
    # Create a group
    pad = pm.group(name=pad_name)
    
    # Create Orient Group
    group = pm.group(name=group_name)
    
    # Snap group to target joint.
    # Snapping using parent constraint.
    kenny = pm.parentConstraint(current_joint, pad)
    
    # Delete parent constraint.
    pm.delete(kenny)
    
    # Parent Constraint Joint to Control
    pm.parentConstraint(control_icon, current_joint, mo=True, w=1)
    
    if last_control:
        pm.parent(pad, last_control)
        

    last_control = control_icon

Saturday, November 1, 2014

Visual Effects 2: Final Project - Maya Fluids (Project 1)

Earlier this week, I created a post showing the WIP of the project that I was currently working on in my visual effects class - Maya Fluids. After fixing up certain areas and adding more visual appeal, I feel like my project is finally complete. Honestly, I loved this project so much that I could have worked on it for hours on end - adjusting attributes and applying more visual appeal. After my first WIP, I added in quite a bit to the project. I added in textures and bump maps on the wooden pallets as well as the ground plane, added in particles that mimc the effect of umbers emerging from a fire, adjusted the speed of the fire, and added expressions to the lights to create a "flicker" that creates the effect of a real fire.

I learned a great deal of things while doing this project. With a bit of troubleshooting and abundant research, I learned how to add a random expression to a physical lights intensity to add a flicker from the light. Each light (five lights total - one ambient light, and four area lights) contains its own light intensity expression, meaning that each lights intensity will change at different rates and change at different times. For example: areaLightShape2 = rand(-1,1). There are infinite options as to what expressions one could apply to a light for a specific look.

Also, I learned how to work with particles once again (more of a refresher) and I mainly, I also learned how to work with fluids. Fluids are fantastic at obtaining any kind of fire that you are looking to achieve for your given scene - campfire, lighter, torch, grass fire, chemical fire, grill, exhaust, ect. In order to achieve the specific goals for your chosen fire, adjusting the fluids attributes will create a successful fluid project.

The main issue that I ran into was the render time of the particles and the fluids separately. The particles (used to create the umbers of the fire) took significantly more time to render with Maya Hardware (2-3 hours) as fluids only took about half of the time (1-2 hours) with Maya Software. The rest of my minor troubleshooting errors were easily taken care of through thorough research and the "trial and error" process.

Finally, here in my Final project! I hope you all enjoy it as much as I did creating it. Thank you!


Thursday, October 30, 2014

Visual Effects 2: Fluid Effects - Project 1

This week I started my November classes, which are "Visual Effects 2", and "Compositing and Scene Finishing". Honestly, I am actually really excited to dive into my visual effects class! There are so many  ways to create life-like effects of real world events. It's really interesting and intriguing to me.

Anyways, for our first project - we are working with Fluids. Our assignment was to have an object in your scene that is emitting fire, anything that is the size of a campfire or larger. 

From there, I decided to make a bonfire with wooden pallets instead of just regular wooden logs. I used the boards of the pallets as the emitters, brought up the opacity of the fire quite a bit, inserted area and ambient lights in the scene (to make the effect of the fire emitting light on the objects around it), and adjusted various settings inside of the fluid to give it its color, randomness, speed, and crisp look.

Here is my "Work In Progress" video of my current Fluids project:

I am learning so much about fluids and the effects that you can create from them! I am excited to finish this project. Also, I realize that the speed is a little too much for this kind of fire, so I plan on slowing it down and also adding in particles for the umbers of the fire. My aim is to match a reference video (one I have chosen) as closely as possible - so I may have to make several more adjustments for the final product.
Stay tuned for the final project! Thank you!

Thursday, October 23, 2014

Software Technology: Research Project

For our team research project, we decided to do the marble machine in Houdini. We each modeled 2 props in Maya (4 props total) that were put together to form the machine and then imported the files into Houdini. Our marble machine was successful, thankfully, but we did run into issues. The problems we encountered was that when gravity took effect on the marble (sphere), the sphere would start to slowly move for the center of the grid instead of downward onto the machine, working as a passive object. Without the proper movement of the ball, the machine itself would not work.

First, a geo node was created. When dove into the geo node, we created a file node and imported our OBJ files (our models). The models were made into static objects. From there, transformation nodes were put into place the models in their respective position. Then, the sphere was created, and it was changed into a polygon and placed in its position with a transformation node. We then made the sphere an RBD object so that gravity would be applied to the sphere.

Below I have attached some photos of the marble machine.

This image displays the entire marble machine.


As seen in the image below, the marble started at the top of the machine as gravity took its effect, dropped the ball on the machine, and then sent the sphere sailing down the machine.


 Then the sphere went spiraling down a different type of ramp...


...and once off of that ramp, it then sailed through a tightly spiraled tube, onto another slide and then through the tunnel - which is the finish line.

We had to troubleshoot the errors in our project simply by tilting the first ramp more drastically, and we change the setting "Geometry Representation" to "Concave" instead of "Convex".

I have learned a lot this month about Houdini and Soft Image, and these softwares are both very different than what we are used to (Maya, ZBrush, PhotoShop are what we mainly use). However, I do like how Houdini works and the interesting things that you can create within it. Even though we encountered issues with our project, we were able to trouble shoot the errors for a successful project! I still had a lot of fun with this project and researching information about it.

Wednesday, October 22, 2014

Character Animation 2: Sound Clip Project Final

The purpose of this project was to learn how to animate the facial movements of the character to match his emotions, and to make the mouth movement match up with the sound to make it believable. I actually really enjoyed this project! I originally thought that lip syncing a character with sound would be difficult to do, and it definitely is a little tricky at first. However, with a little practice and research, you can really create a great lip sync project. I did not encounter too many issues with this project, other than animations issues - trying to make his movements convey with what he was talking about.

I am still learning how to make stronger poses, moving holds, and anticipations as I journey through my schooling. However,  I feel as though I have learned a lot in this class and can really gain from the projects that we did. Finally, here is my final Sound Clip project. Enjoy!


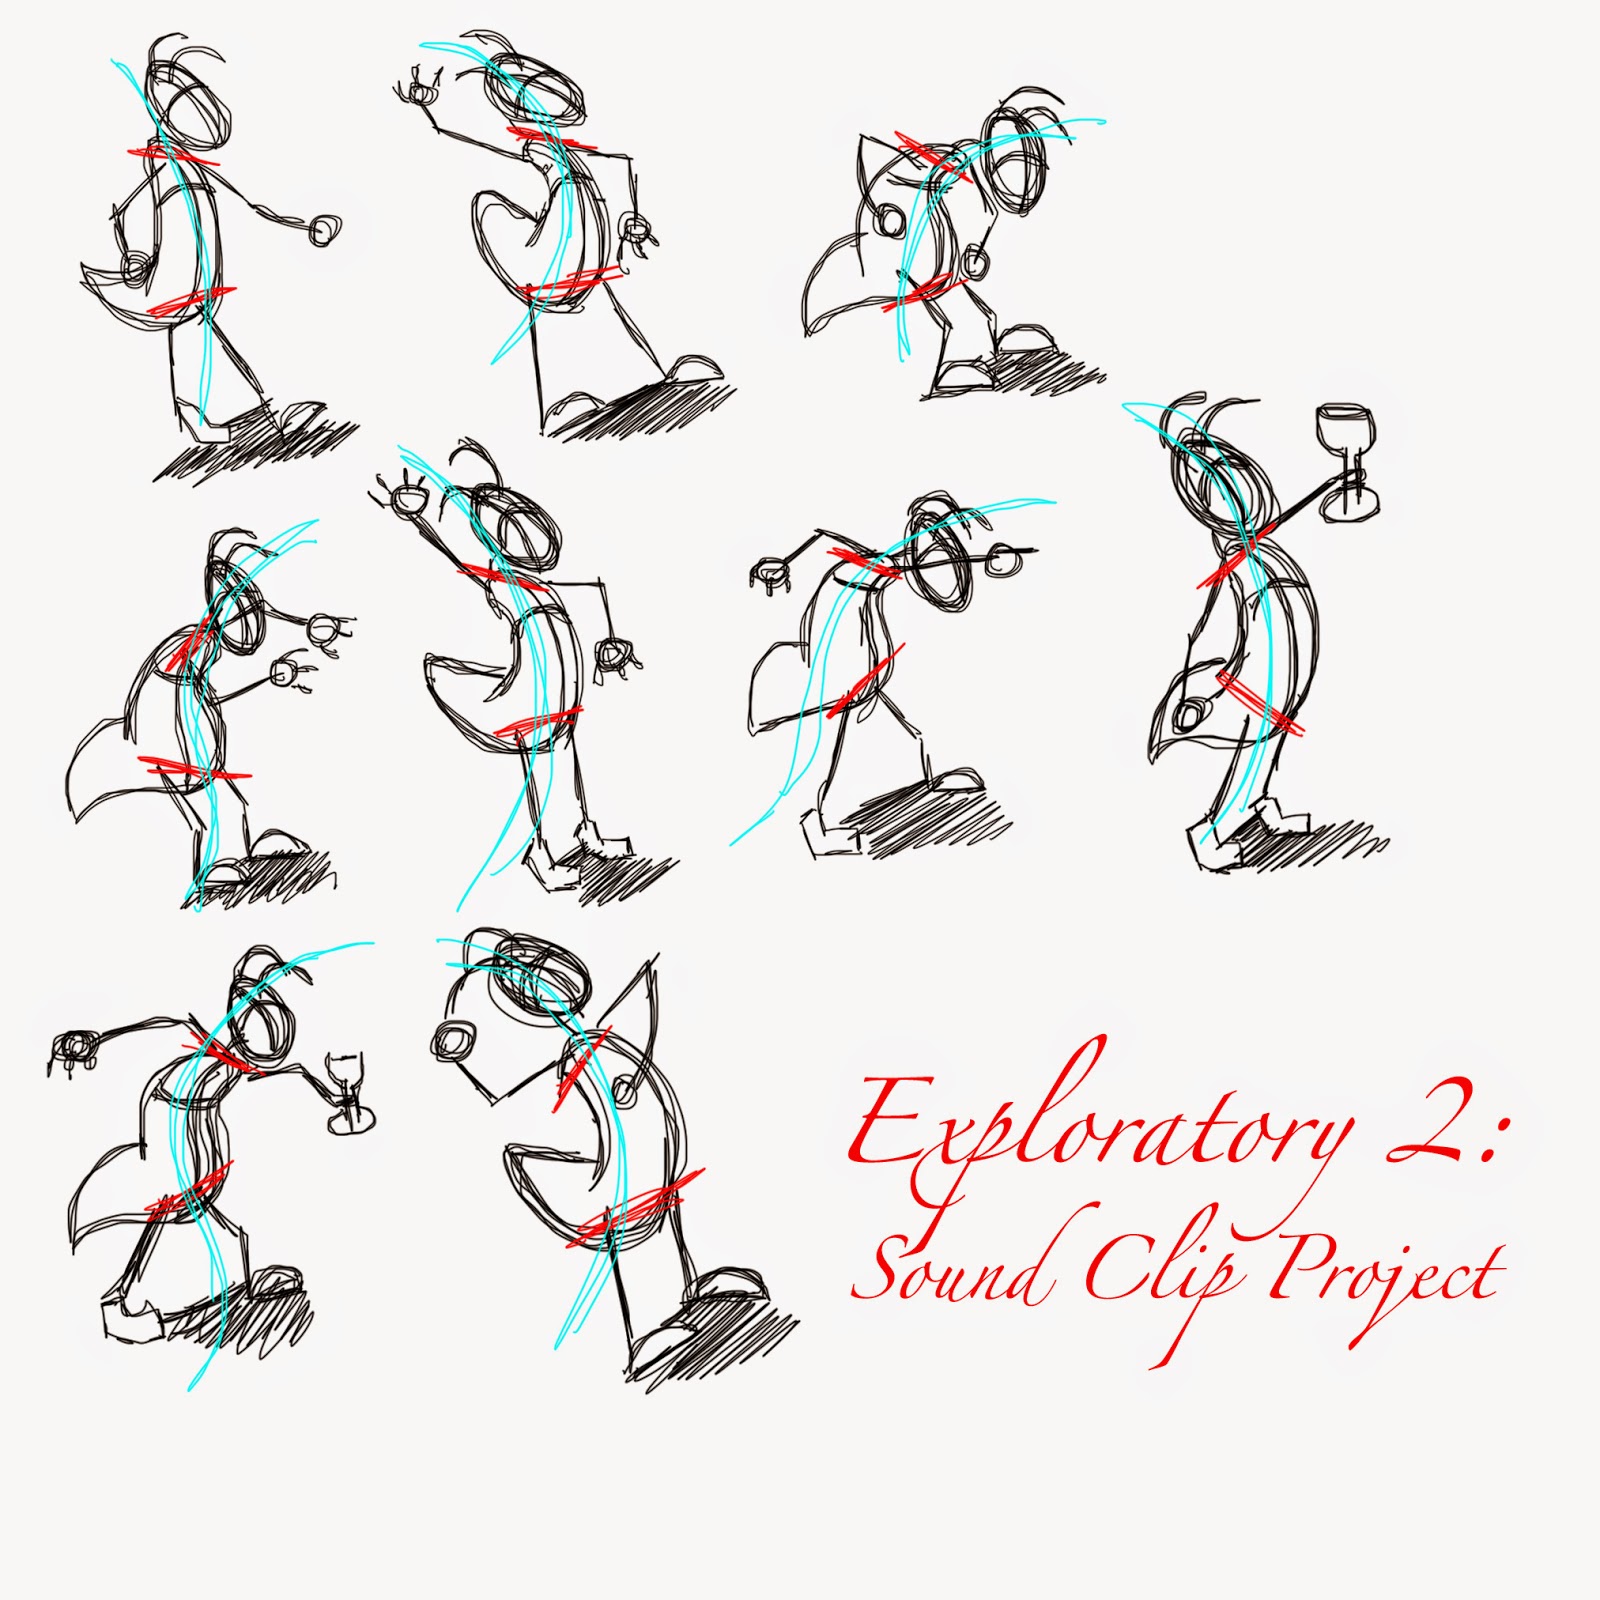
Below, I have included the pre pro that I created prior to this project. I have created two pages of exploratory drawings, the storyboard, and I also filmed my reference. From here, I was able to understand what my composition was going to look like, what action lines I needed to make, and what possible poses I could create as well.

I admit, my drawings are not the greatest and most professional-looking drawings. However, they do get the job done of allowing me to understand how I need to pose my character and my camera for my project. 


Thank you! I hope you enjoyed this! :)


Monday, October 20, 2014

Drawing Process Explanation

I have had several people ask me what my process is when I draw or paint once my projects are completed. After receiving these questions and advice, I decided to take pictures every few hours while creating this piece. 

Everyone has their very own, custom creative process - but with mine, I like to jump around the page a little bit and then bring all of the assets together in the end to form the final piece. I am a self taught artist, and am always learning new techniques with drawing, painting, and other mediums that I am not as familiar with. I am extremely open to trying new techniques and new mediums! Art is such an adventure - I am always willing to broaden my horizons for techniques, project ideas, and mediums/medias.

This piece was created August 28, 2014.


Wednesday, October 15, 2014

United Nation Climate Change Projects: Art Pieces

Today, I received confirmation that we are now officially allowed to post up our artwork pieces that were used for the competition up on our social media sites! After 2 long months of patiently waiting, I am very enthusiastic to share these pieces with you all in hopes to make a difference in climate change, and to change people's perspectives on climate change as well.

Again, I just want to say thank you to Full Sail members for helping us through this, and also to the Embassies of France who proposed such a great opportunity to us students. I really enjoyed this extra circular project, and hope to find more opportunities such as this in the near future!

This piece won first place in the Art division
Title: "The Erosion of Us"
Date: August 13th, 2014
Medium: Prismacolor pencils


Lastly, this piece won second place for the Art division.
Title: "United as One"
Date: August 28, 2014
Medium: Graphite pencil


Tuesday, October 14, 2014

United Nations Climate Change Project: Winner Announcement

In August, I created a post explaining what the United Nations Climate Change project was and what it entailed. For those of you who are unaware of this project, this project was proposed to Full Sail University and it's students by the Embassies of France to make a difference in climate change. They asked us to find creative ways to promote solutions and raise awareness for climate change so we can change the world for the better. The Embassies of France would also like to use our artwork and creations at conferences that will be held in Canada, North America, as well as France. We were proposed to use our artistic freedom to create what we thought would raise awareness in the best ways possible. We were given a two week deadline to complete this project - on top of the courses that we are currently taking at Full Sail for our degrees. This project started on July 6, 2014.

Today, the winners for this project were announced! Each category (art, film, marketing, and music) had first, second, and third place winners. I am proud to announce that I was fortunate enough to win first, as well as second, place for the two traditional art pieces I submitted in the Art category! The directors of this organization at Full Sail also provided all of the participants of this project with letters of recommendation to add to our portfolios. I am so incredibly blessed and thankful for this opportunity!

This project taught me how to manage my time management skills, I learned about the effects of climate change and what we can do to change it, and I also feel honored to be a part of such a great organization that will make a difference in this world. This project gave many of us fantastic opportunities to blossom as artists. With that said, I just want to say a big thank you to the Embassies of France for providing us with this great opportunity, and thank you to Full Sail as well for providing us with this challenge as artists.


Monday, October 13, 2014

Character Animation 2: Pantomime Final Project

For the past two weeks, we have been learning how to make a character change from one emotion to another one through a series of body movements and facial expressions. Earlier this month, I posted up the "block out" version of this final project. From there, I added in anticipations, breakdowns, moving holds, and made adjustments in the graph editor to create a smooth flowing animation.

My characters emotions change from sad/deeply depressed, to exhilarated and very excited.
I used a parent constraint on the hand control and the piece of mail that the character grabs out of the box, and just keyed it on when it was needed. I hope you enjoy it!


Below, I have added in the Pre Pro work that I created before taking on this project and making it into a 3D Animation. These drawings helped me understand how the line of action needed to look, how to pose the character, the composition of the project, the breakdowns and what poses I needed to do in order to create the correct emotion at the correct time. 

What I learned about making pre pro for each project is that reference is key to a strong project. From reference, you can see how the body moves realistically. From that reference, you can draw out key poses, breakdown poses, and exploratory poses that could be possibilities for the project at hand. Without reference, a project will be lacking significantly. 


Friday, October 10, 2014

Software Technology: Kooshball

This month I am taking Software Technology at Full Sail. In this class, we are learning how to model in different software programs (other than Maya and ZBrush) such as Houdini and Soft Image so that we will have a more diverse knowledge of how to model and which software would work best for a specified project. We are also learning different modeling techniques - newly introduced as well as old techniques - for future reference and to help improve our modeling skills.

Yesterday, we learned created a Kooshball in Houdini. This was the first time I have ever used Houdini, but I quickly learned that the nodes worked very similar to Nuke, and the scripting was similar to the scripting we would do in Maya for rigging purposes. Also, this helped open up a new way for me to model and create objects that would be very difficult to create in other software programs.

Tuesday, October 7, 2014

Character Animation 2: Pantomime Project (1)

This month, I have Character Animation 2 as one of my classes. In this class, we are being taught how to make a character change from one emotion to another based on events that happen in the scene. We will also be learning how to create lip syncing for the characters with voice audio's applied to them, but we will won't move onto that until we reach Project 2: Lip Syncing.

Below I have attached a progress video of the Pantomime project that I am currently working on. All that I have completed so far is the blocking out of the keys in this video. From here, I will carry out my break downs, anticipations, and moving holds to make the movement more fluid and believable for the audience to understand what is really going on.

The Back Story: The character is female, in her early 20's, living a normal-average life. She is currently struggling for money, living alone away from her home state, and working extremely hard to land her dream career, but it is taking some while for her to reach that goal. In the meantime, she has a boyfriend who is a United States Marine, whom of which she can only speak to through letters and she does not receive letters from him often. The letters are on the biggest highlights of her day, as she is always worried and thinking about her Marine.

Thursday, September 25, 2014

Visual Development: UV Layouts, Textures, and Layered Textures (Project 2)

For our second project in this class, we learned how to properly layout the UV's of an object in order to create an effective/realistic texture, how to create the textures needed for that object in Photoshop by following the layouts of the UV's as reference, and also how to make a layered texture map in Maya to project images on top of each other in a proper manner.


Picture to the Left: This is a UV snapshot of the metal scraper that I needed to texture in the given scene. I learned how to layout these UV's by cutting and unfolding the UV's, sewing them together dependent on the material that the area consists of, and laying them out properly in the 0-1 space. After I completed this project, however, I realized that I could of improved the UV layout of the handle (on the left) because one side of the handle curves too much and it resulted in a distorted texture.

Picture to the Right: This image shows the texture layout that I created in Photoshop that match up with the UV layout of the scraper. I used masks, several layers, and the clone stamp tool to create the realistic textures of the scraper. From here,  I can import this file into Maya and the texture for the scraper will be completed, and look realistic. Although, once again, I realized that I could have improved this layout after the assignment was finished by making sure that my UV's are laid out perfectly before texturing, and to also not overuse the clone stamp tool too much as it can create a fake look for the material.


Picture to the Left: In this photo, you can see the sticker (Vans sticker) and the dirt spot (next to the sticker) that I created using layered textures in Maya's hyper shade. I learned how effective this method can be to create the specific output that you are looking for, depending on the scene. 

Picture to the Right: This photo shows the final look of the metal scraper after the texture layout was applied to it. The texture appears to be realistic and not distorted, making it more life like for the audience. 


Wednesday, September 24, 2014

Visual Development: Lighting Scenes (Project 1)

This month in my Visual Development class, we have learned how to do a various amount of things to make a scene more appealing for the audience through lighting, knowing which types of lights to use in a specific type of scene, how to layout UV's properly and create the textures in PhotoShop for those UV's, caustics, render passes and compositing them together in Nuke, and also how to create layered textures in the hyper shade of Maya to create the textured look that you are aiming for on the objects in the scene.

For our first project in this class, we learned about how to light a scene properly.

Picture on the Left: I adjusted the color, intensity, light shape, and size of the light in the back room (area light) to give it the appearance of an incandescent light. The light that is shining on the door is a directional light that had it's color, intensity, location, position, and the size adjusted to shine on the correct spot.
Picture on the Right: From the first lit scene, we added a black body to the area light in the back room, and readjusted the intensities and color of the light. From there, more area lights were added to the scene to light up the very back room, and the room with the bottle in it to give it the appearance that it is in a day-time setting.

In both of these projects, we learned how to deal with the shadow rays and making the shadows more appealing. Also, we learned how to adjust the point interpolation to adjust the look of the scene.


Monday, September 8, 2014

Learning Motion Capture

Here are two of my newest projects for my Motion Capture class at Full Sail University. We are learning how to clean up the motions of markers, name the markers accordingly, properly attach the markers to a rig, and create a fluid final animation. 
The final project for this class will consist of us students acting out the animation in the MoCap suits, cleaning up the motions and the other components in the software programs Cortex, Motion Builder, and Maya. From there, we will create a scene that will involve lighting and shading, texturing, modeling, storyboarding, and compositing to make the final product. In the end, we will have a fully functional Motion Capture animation that creates and entertaining story for the audience. The progress of this project will be posted up throughout the month, so please stay tuned!  

Purpose: Class Assignment - Lab 1 (Motion Capture - Full Sail)
Assignment Type: Learning the Basics
Software: Cortex, Motion Builder, Maya
Date: September 3, 2014

Purpose: Class Assignment - Lab 2 (Motion Capture - Full Sail)
Assignment Type: Applying Basics to more Complex Motions
Software: Cortex, Motion Builder, Maya
Date: September 5, 2014

Tuesday, September 2, 2014

Character Animation 1: Final Project

Purpose: Class Assignment (Character Animation 1 at Full Sail University)
Assignment: Basic Walk Final
Month: August 2014

From this assignment, we learned how to properly do a basic walk with 3D animation along with other overlapping animations.

Friday, August 29, 2014

United Nations Climate Change Project

Starting on July 6th, I have been working on a global project for an event called FACTS (French Ameri-Can Climate Talks) for the United Nations Climate Change project.

Here is some of the background behind this competition: This event is leading up to a United Nations Climate Change conference that will be hosted in France in December 2015. FACTS is an event organized by the Embassies of France in Canada and the United States, and it is a public conference series that is planned to take place in seven cities in the United States and Canada involving renowned scientists, civil society representatives, political figures, NGOs, journalists and entrepreneurs. (http://facts.france-science.org)

The purpose of this competition is to raise awareness of climate change, educate people about climate change, and also to try to find resolutions on how to prevent - or decrease - climate change. The Embassies of France decided that they wanted to take a more creative approach on how to raise the awareness about climate change, so they came to one of the most creative universities in the United States - Full Sail University. With our creativity and skill, the Embassies of France want us to use our creative thoughts in a way to raise awareness for climate change while catching the attention of the audience with our creativity.

The event started on July 6th, as we went to a seminar at the school to be given information about FACTS and United Nations Climate Change. There are several different categories of art for this competition: film, traditional 2D art, music, marketing planning, and 3D art. Each category will be judged separately, and there will be a first, second, and third place winner for each category. First, we were instructed to submit a three sentence description about our project. Then, we were instructed to submit our final draft of our project (whatever media/medium it may have been) for the first round of judging on August 13, 2014. Lastly, we were granted revisions on our final projects from August 25th - August 28th. The winners of each category will be announced on Saturday, August 30th.

I chose to crate a 2D traditional art piece (graphite pencils and PrismaColor pencils) as I am most comfortable with traditional art for projects such as this. I would absolutely love to post up my work in progress pictures of my projects, as well as the final products, up on this blog! However, the Embassies of France instructed us not to post up our work up on any social media sites until the judging is complete. Once the judging is over with - and if I have the permission to do so - I will more than happy to post up pictures of my work.

This project is not mandatory for any student to be a part of - I just found that this competition could potentially open doors for me and get my brand out to people in the world, especially since the event is globally wide. If I win at this competition, it could potentially lead to something great for myself and my career. However, even if it does not lead to any openings for me, or if I do not win the competition at all, I really did learn a lot of great values from this competition. This project helped me get in a lot of creative time for myself so that I can refresh myself on drawing and managing time management. I also was able to learn a thing or two about climate change that I did not do before.

In the end, even if I do not win this competition, I am so thankful that Full Sail grants us with such great opportunities like this! I also will be thankful that I was able to draw two new, awesome pieces to add to my portfolio. Also, the great cause of the subject of this competition was jus too hard to pass up. Once the competition is over and the winners are announced, I will be more than happy to share the drawings on this blog for all of my followers to enjoy, and to see what I experience through this month long journey. Wish me luck! Updates are soon to come!!